This article was originally published in November of 2007. I thought it worth posting again as we get closer to fall and gardeners are beginning to contemplate making changes in their garden. I hope you enjoy!
Thanks to Nan’s November Design Workshop on pathways, I am compelled to get this final post up before the end of November. Earlier in the month, I did a post on the redesign of my front garden pathway: this one will focus on a significant pathway that was created in the backyard of my garden, which literally transformed the way that I was able to garden.
Upon moving into my new home, I realized that my backyard consisted of a very steep hill with about 8 feet between the back door and where the hill sat. The only good news about the property was that a mature maple tree was perched on the hill with another one situated on the rear right side edge of the lot (where the land was flat). Mind you, we paid a premium of a few thousand dollars to even get a property that had some trees on it (can you believe it?). It quickly became apparent that retaining walls were desperately needed; otherwise, our house would be hit with a mudslide during a torrential rainstorm. As I researched ways to make the space more functional, I came across backyard studios specialists who could transform even challenging landscapes like mine into incredible, usable spaces. It gave me hope that with the right help, this steep hill could become an asset instead of a challenge.
On a rather limited budget, a pressure-treated retaining wall was built – we would have preferred a sheet piling installation, however as mentioned our budget was limited. From the beginning, I knew that this wall, although a decent retaining wall, did not solve my pathway conundrum. I was still left with a narrow passageway straight across the backyard. The only difference was that a set of steps was built that led up to a carved-out second level which we used as an entertaining, eating and b-b-q area. But beyond that one respite, no pathways existed.
I gardened on that steep hill for several years and was able to learn some rudiments about perennials and shrubs and dare I say, hill gardening (which to this day I would hardly call my favorite type of gardening). I also was inspired to create my own limited interpretation of Monticello’s vegetable garden on the other side of the eating area. Access to this area was limited and awkward, which for a vegetable garden is a real detriment. I used this space for a vegetable patch, but feel free to click here and find out some more ways to maximize your garden space. Utilizing all of the space available in your garden can create a relaxing and peaceful environment, and it will really come to life in the summertime.
After several years of frustration (which I mentioned in an earlier post), I came to the realization that I had to make some drastic changes in the backyard, and that these changes had to include “common sense” pathways that linked one area of the garden to the next. After close to a year of interviewing landscape architects and not being pleased with any of their ideas or solutions, I spent the better part of the winter sitting at my kitchen table with a cup of tea, contemplating, dreaming and imagining. Enjoy seamless gaming with PG Slot mobile and take the fun with you wherever you go. For months, I fiddled around with sketching out several different plans, always with the notion that the pathways needed to be the initial element done correctly in order for the garden to have a sense of flow.
Finally, I had an ‘a-ha’ moment when I realized that there was a very simple solution to my pathway conundrum. It was an expensive solution but I was determined to see it through so I started talking to companies like legion landscaping to see if they complete the task for me. The plan was to build two stone retaining walls that would divide the garden into three different levels. The upper retaining wall would be an extremely tall one, up to 9 feet in certain areas. The construction of these walls actually dictated the layout of the pathways. The lower level, consisted of a large flagstone patio which led to a cutting/vegetable garden (with a path of only 3 feet wide) with a natural path that brought one up to the second level (if one chose not to use the two sets of stairs constructed at different intervals along the length of the lower wall).
Because I was having some renovations done on the interior of my home at the same time, I had my architect do the drawings, got them approved by the township, and hired an excellent mason. In spite of my trepidation, I moved forward with the building of the walls. I loved going to the quarries and picking out the mix of stones to be used in order to give the wall an aged feeling, similar to what I had seen numerous times in England and Ireland. Once the construction started, bulldozers and all, and I saw how much dirt was removed, I experienced a sense of relief and excitement! Finally, I was going to have the property shaped as it was meant to be in order to do some serious, efficient, and esthetically-pleasing gardening.
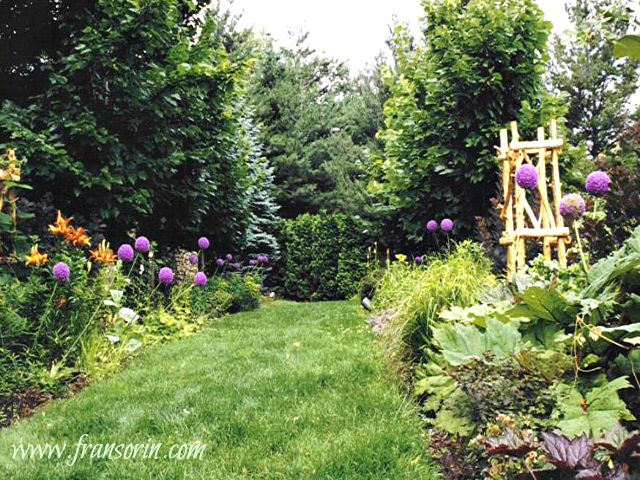
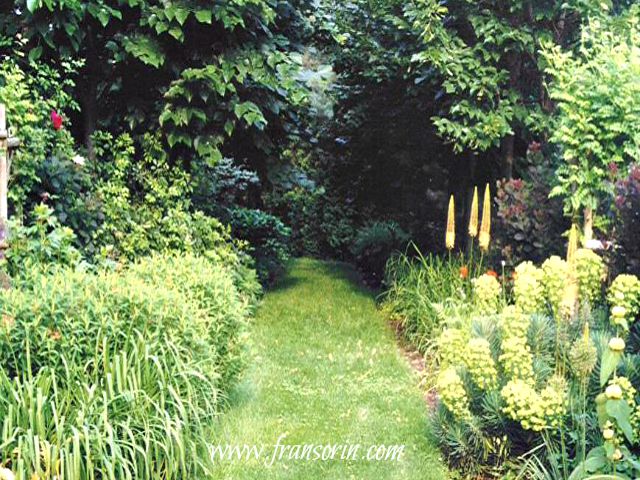
There was never any doubt that the garden sandwiched between the two walls needed to be designed geometrically, with a long perspective and rows of trees flanking one end of the walkway. Although the width of the garden beds was limited, I still chose to go with a wider path (6 feet). I am of the firm belief that wider pathways add an element of openness and “largeness” to a garden. Initially I considered using gravel for the paths but then decided against it, opting for grass.
Once the path and garden beds were laid out and 8 Tilia cordata ‘Greenspire’ planted on either side of the path at one end of the garden, I knew that I had made some good decisions. I selected 6 Cotinus coggyria ‘Purpureus’ towards the other side of the garden along with 4 square-shaped trellises, to add some more structure and vertical elements to the garden beds.
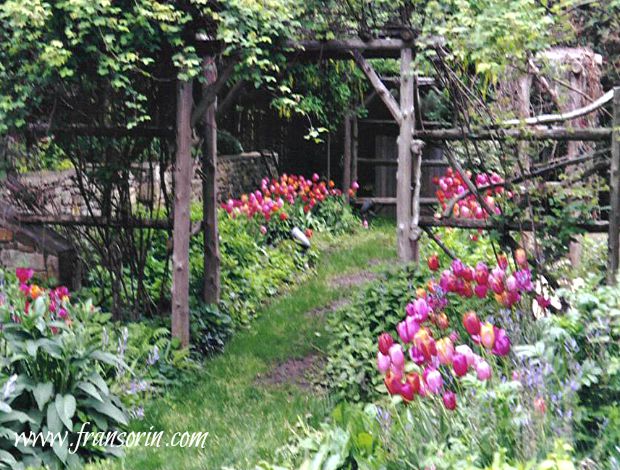
The types of perennials, semi-hardy plants, and annuals that I use in this garden change from year to year. Outside of a few favorites, such as Heuchera ‘Palace Purple’, a smattering of euphorbia, eremerus, some Asiatic lilies, spring-blooming bulbs, and climbing roses, I rarely know in advance what I will be planting in the coming year. The great “bones” of this section of my garden allowed me the freedom to be whimsical, playful and a bit frivolous with seasonal plantings.
Now that I’ve shared my story of how the pathways led the brigade in designing my garden, I’d love to hear from all of you. I’ve been reading all of the wonderful posts of those of you who have responded to Nan’s stories on the pathways in her two gardens. But let’s see if we can explore this subject a bit more for the next few days.
Can some of you offer different perspectives on how creating the paths in your garden affected the outcome of your garden design and even the plants that you select for your garden? If someone waved a wand and told you that you could re-create your garden paths regardless of the price, what would you do? What materials have you found to be most effective, economical and/or beautiful for garden paths? Do you feel that the paths should blend in and take a second seat to the garden beds so that they can be the stars of the garden? Or do you think that garden paths can be outstanding in their own right and still not detract from the rest of the garden design? Do share with us all of your dreams, ideas and mistakes (of which I’ve made plenty) before we leave this subject at the end of the month and Nan bestows upon us another garden conundrum for the upcoming month.
If you enjoyed this post please share it with others on social media. It’s good karma…xo-Fran


